
Valve alignment is a crucial aspect of trumpet maintenance‚ often overlooked yet profoundly impacting performance. Worn felt washers and moisture
can significantly affect how accurately valves seat‚ leading to noticeable issues.
Addressing alignment improves playability and intonation‚ ensuring a smoother‚ more responsive playing experience for musicians of all levels.
What is Valve Alignment?
Valve alignment‚ in its simplest form‚ refers to the precise positioning of a trumpet’s valves within their respective casings. This ensures that when a valve is depressed‚ it perfectly seals‚ redirecting airflow through the instrument’s tubing to achieve different pitches.
The valve guides and valve casings work in tandem; proper alignment relies on the accurate interaction between these components. Over time‚ felt washers – crucial for creating a tight seal – compress and wear down‚ especially with moisture exposure.
This degradation causes air leaks‚ impacting intonation and making it difficult to achieve clean‚ consistent notes. Essentially‚ valve alignment is about restoring the original‚ precise mechanical function of the valve system.
Why Valve Alignment Matters: Playability & Intonation
Valve alignment directly impacts a trumpet’s playability. Misaligned valves create “slotting problems‚” making it challenging to accurately hit desired notes‚ requiring excessive air pressure‚ and leading to fatigue. A well-aligned valve system offers a smooth‚ responsive feel‚ allowing for quicker and more precise articulation.
Furthermore‚ alignment is critical for accurate intonation. Air leaks caused by worn felt washers or improper seating distort pitch‚ resulting in notes that are consistently sharp or flat. Correct alignment ensures that each valve combination produces the intended pitch‚ improving overall musical accuracy.
Ultimately‚ proper valve alignment enhances the trumpet’s responsiveness and tonal clarity.

Understanding Trumpet Valve Mechanics
Valve casings house the valves‚ guiding their movement and directing airflow. Valve guides ensure precise alignment‚ while worn guides cause binding and affect the instrument’s response.
The Role of Valve Casings
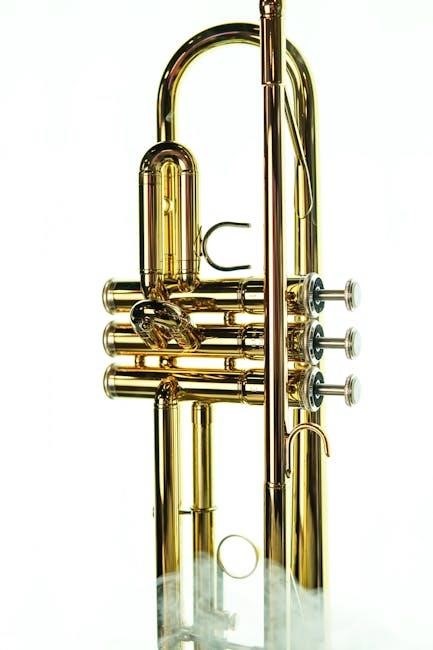
Valve casings are integral components‚ meticulously crafted to house and guide the trumpet’s valves. These cylindrical structures aren’t merely containers; they are precision-engineered pathways for airflow‚ directly influencing the instrument’s tonal quality and responsiveness.
The casings feature precisely machined ports that align with corresponding openings in the valves. This alignment is paramount‚ as even slight discrepancies can lead to air leaks and compromised performance. Furthermore‚ the casings provide a secure mounting point for the valve guides‚ which are essential for maintaining accurate valve travel.
A well-maintained casing contributes significantly to smooth valve action and accurate intonation‚ while damage or wear can necessitate professional repair or replacement to restore optimal functionality.
Valve Guides and Their Function
Valve guides are critical components within the trumpet‚ ensuring the valves move in a straight and consistent path. These small‚ often overlooked parts prevent the valves from binding or sticking‚ contributing to smooth and rapid action. They are typically secured within the valve casings and play a vital role in maintaining proper valve alignment.
Their primary function is to precisely center the valves‚ guaranteeing that the airflow is directed correctly when each valve is depressed. The guides work in conjunction with felt washers‚ creating a tight seal and minimizing air leakage.
Properly functioning valve guides are essential for optimal intonation and playability‚ and their condition directly impacts the overall performance of the instrument.
Impact of Worn Valve Guides
Worn valve guides significantly degrade trumpet performance‚ leading to a cascade of playing issues. As the guides lose their precision‚ valves begin to wobble‚ causing inconsistent airflow and noticeable slotting problems – difficulty accurately hitting desired notes. This imprecision directly impacts intonation‚ making the instrument harder to tune.
Furthermore‚ worn guides contribute to valve binding‚ where valves stick or become sluggish‚ hindering fast passages and overall responsiveness. The felt washers‚ crucial for sealing‚ wear down alongside the guides‚ exacerbating air leakage and further diminishing performance.
Ultimately‚ neglecting worn valve guides results in a frustrating playing experience and diminished musical quality.

Tools Required for Trumpet Valve Alignment
Essential tools include screwdrivers‚ Allen wrenches‚ and specialized valve alignment tools. Felt washers and appropriate lubricants are also vital for restoring proper valve seating and function.
Basic Hand Tools: Screwdrivers & Allen Wrenches
Screwdrivers and Allen wrenches are fundamental for disassembling and reassembling trumpet valves during alignment procedures. Different screw sizes are common on trumpets‚ necessitating a set with varied head types and lengths.
These tools allow access to valve casing screws‚ enabling removal for inspection and adjustment of the valve guides. Precision is key; using the correct size prevents stripping screw heads.
Carefully loosen and tighten screws to avoid damaging the instrument. A quality set of these hand tools is a worthwhile investment for any trumpet owner undertaking DIY maintenance‚ ensuring a secure and effective workflow.
Specialized Tools: Valve Alignment Tools
While basic tools suffice for initial inspection‚ dedicated valve alignment tools significantly enhance precision. These tools often feature precisely machined pins or rods designed to verify the straightness of valve guides and ports.
They help identify binding points and ensure valves seat correctly within the casings. Some tools allow for gentle adjustments to guide position‚ improving alignment without causing damage.
Investing in these specialized tools demonstrates a commitment to thorough maintenance and can yield substantial improvements in trumpet performance‚ particularly for those frequently performing DIY repairs.

Materials: Felt Washers & Lubricants
Felt washers are essential consumables in trumpet maintenance‚ acting as cushions under valve buttons. Over time‚ these felts compress and wear down‚ impacting valve alignment and creating unwanted noise. Having a supply of replacement felts is crucial for any alignment procedure.
Appropriate lubricants are equally vital. Valve oil reduces friction between moving parts‚ ensuring smooth operation. However‚ avoid over-lubrication‚ as it can attract debris.
Selecting high-quality lubricants specifically designed for trumpets will prolong valve life and maintain optimal performance.

Identifying Valve Alignment Issues
Misaligned valves often manifest as slotting problems – difficulty achieving clear notes. Valve binding‚ where valves stick or feel sluggish‚ is another key indicator of misalignment.
Symptoms of Misaligned Valves: Slotting Problems
Slotting problems are a primary sign of valve alignment issues. Players experience difficulty consistently hitting the correct pitch‚ requiring excessive air or embouchure adjustments. This manifests as a “fuzzy” or unstable tone‚ where notes feel imprecise and require constant correction.
Instead of a clear‚ defined “slot” where the note locks into place‚ there’s a wider‚ less predictable range. This makes accurate intonation challenging‚ especially during fast passages or complex musical phrases. The trumpet may feel unresponsive‚ demanding more effort to produce a stable sound. These inconsistencies directly stem from valves not sealing properly due to misalignment‚ impacting the airflow and therefore‚ the pitch.
Checking for Valve Binding
Valve binding indicates a more severe alignment problem. Gently press each valve down individually – it should move smoothly and freely with minimal resistance. If a valve feels sticky‚ sluggish‚ or requires excessive force to depress‚ it’s likely binding within its casing.
Listen for any unusual noises‚ like scraping or grinding‚ during valve movement. Binding restricts airflow‚ causing noticeable intonation issues and potentially damaging the valve itself. Carefully observe the valve’s travel; it should align perfectly straight within the casing. Any wobble or uneven movement suggests misalignment and potential binding‚ requiring immediate attention.
Visual Inspection of Valve Casings
Visually inspecting the valve casings reveals crucial clues about alignment. Examine the casings for any dents‚ bends‚ or distortions that could impede valve movement. Look closely at the ports – the openings where valves seat – for signs of wear‚ corrosion‚ or debris accumulation.
Ensure the ports are clean and free from obstructions. Check for even wear patterns; uneven wear suggests the valve isn’t seating correctly. Inspect the felt washers within the casings; worn or damaged felts contribute significantly to misalignment. Any visible damage warrants replacement to restore proper valve function and airflow.

DIY Trumpet Valve Alignment Procedure
Begin by carefully disassembling the valves‚ then thoroughly inspect the valve guides and ports for wear or damage. Adjusting guide position is key for optimal alignment.
Step 1: Disassembly of Valves
Begin the process by gently removing each valve from the trumpet body‚ noting their specific order – typically numbered 1‚ 2‚ and 3. This order is critical for reassembly. Carefully pull down on the valve guide to release the valve‚ avoiding any forceful movements that could cause damage.
Inspect the valve slides before complete removal. Once the valves are free‚ examine the valve casings and the valves themselves for any visible signs of wear‚ corrosion‚ or debris. Pay close attention to the felt washers on the valve stems‚ as these are prone to wear and can significantly impact alignment. Document the condition of these components before proceeding.
Step 2: Inspection of Valve Guides & Ports
Thoroughly inspect each valve guide for any signs of bending‚ warping‚ or damage. Use a straight edge to check for flatness. Examine the ports within the valve casings‚ looking for dents‚ scratches‚ or obstructions that could impede smooth valve travel.
Pay particular attention to the alignment of the valve guides with the ports; misalignment is a primary cause of valve binding and slotting issues. Check the felt washers for wear‚ compression‚ or moisture damage. These felts are crucial for a proper seal and accurate valve alignment‚ impacting intonation and playability.
Step 3: Adjusting Valve Guide Position
Carefully loosen the screws securing the valve guide‚ allowing for slight adjustments. Gently reposition the guide‚ ensuring it’s perfectly aligned with the corresponding port in the valve casing. Use a specialized valve alignment tool‚ if available‚ to verify proper alignment.
Tighten the screws incrementally‚ frequently checking for smooth valve action. Avoid over-tightening‚ which can damage the guide or casing. If the guide remains misaligned‚ consider replacing the felt washers‚ as they can compensate for minor imperfections. Remember‚ precise adjustment is key to optimal performance.
Addressing Worn Valve Guides
Worn felts compromise valve seating‚ impacting alignment and performance. Replacing these felt washers is a common fix‚ addressing issues caused by wear and moisture damage.
Replacing Felt Washers
Replacing felt washers is a straightforward repair‚ often resolving minor valve alignment problems. These small components‚ positioned under the valve buttons‚ wear down over time due to compression and exposure to moisture. Carefully remove the old felts‚ noting their placement and thickness.
Clean the valve button and casing thoroughly before adhering new felts‚ ensuring a secure fit. Use appropriately sized replacements – too thick‚ and the valves won’t seat correctly; too thin‚ and alignment issues persist. This simple step can dramatically improve valve action and overall trumpet responsiveness‚ restoring optimal playability.
Dealing with Moisture Damage to Felts
Moisture damage significantly compromises the integrity of valve felts‚ causing them to compress‚ distort‚ and lose their cushioning properties. Regularly address condensation buildup within the trumpet to prevent this. If felts become saturated or show signs of deterioration – crumbling‚ discoloration‚ or loss of shape – immediate replacement is crucial.
Avoid attempting to dry and reuse damaged felts‚ as their structural integrity is already compromised. Thoroughly dry the valve casing before installing new replacements. Consistent preventative care‚ including proper drying techniques after playing‚ will extend felt lifespan and maintain optimal valve alignment.
When to Seek Professional Repair
Professional repair becomes necessary when DIY attempts fail to resolve persistent valve alignment issues‚ or if you suspect significant damage to the valve casings or guides themselves. Deeply ingrained corrosion‚ bent valve casings‚ or severely worn guides require specialized tools and expertise.
Don’t hesitate to consult a qualified technician if you encounter binding that cannot be corrected with simple adjustments. Attempting complex repairs without proper knowledge can cause further damage. A professional can accurately diagnose the problem and restore your trumpet to optimal playing condition‚ ensuring long-term performance.

Preventative Maintenance for Valve Alignment
Regular cleaning and lubrication are vital for maintaining valve alignment‚ preventing wear on felt washers and ensuring smooth valve action over time.
Proper storage and avoiding temperature extremes also protect the delicate valve components from damage and misalignment.
Regular Cleaning and Lubrication
Consistent cleaning is paramount for preserving optimal valve function. Debris and old lubricant accumulate‚ hindering smooth valve travel and accelerating wear on the felt washers within the valve casings. A gentle cleaning routine‚ involving valve oil and occasional disassembly for thorough cleaning‚ is essential.
Lubrication‚ using a high-quality valve oil‚ minimizes friction and protects the valve components. Apply oil sparingly but consistently‚ ensuring it reaches all contact points. This prevents binding and maintains accurate valve guide alignment. Neglecting lubrication leads to increased wear and potential damage‚ ultimately impacting intonation and playability.
Remember to wipe away excess oil to avoid attracting dust and grime.
Proper Storage of the Trumpet
Correct storage significantly extends the life of your trumpet and maintains valve alignment. Always store the instrument in its case when not in use‚ protecting it from dust‚ impacts‚ and environmental factors. Avoid leaving the trumpet in areas exposed to extreme temperatures or humidity‚ as these can damage the felt washers within the valve guides.
Moisture buildup is a common culprit in valve issues; ensure the instrument is completely dry before storing. Loosening valve slides slightly can also help prevent corrosion. A stable‚ level surface prevents accidental drops or pressure on the valves‚ preserving their delicate alignment and ensuring consistent performance.
Avoiding Extreme Temperature Changes
Rapid temperature fluctuations are detrimental to trumpet valve alignment‚ particularly affecting the felt washers within the valve guides. These felts expand and contract with temperature shifts‚ potentially causing misalignment and impacting the seal between the valve and casing.
Never leave your trumpet in a car during hot or cold weather. Avoid playing or storing the instrument immediately after moving between drastically different environments. Gradual acclimatization is key; allow the trumpet to reach room temperature before playing or performing maintenance. Consistent temperatures preserve valve integrity and optimal performance.

Advanced Valve Alignment Techniques
Fine-tuning valve alignment requires precision‚ utilizing specialized alignment tools to meticulously adjust valve guide positioning for optimal responsiveness and seamless transitions.
Effective tool use‚ combined with careful observation‚ unlocks peak performance potential.
Using Alignment Tools Effectively
Valve alignment tools‚ while seemingly complex‚ become intuitive with practice. These tools assist in precisely gauging and correcting the positioning of valve guides within the trumpet’s casings. Begin by ensuring the trumpet is thoroughly cleaned and valves are disassembled.
Carefully insert the alignment tool into the valve casing‚ observing how the guide interacts with the tool’s indicators. Gentle adjustments are key; avoid forceful manipulation that could damage the delicate components. Focus on achieving a smooth‚ consistent alignment across all three valves. Remember‚ the goal is to ensure the valve ports align perfectly for optimal airflow and responsive action. Consistent use and careful observation will yield the best results.
Fine-Tuning for Optimal Performance
Fine-tuning valve alignment extends beyond initial correction. After adjustments‚ reassemble the valves and test the instrument across its full range. Pay close attention to slotting – a clear‚ defined feel when depressing each valve. Imperfect alignment manifests as resistance or “slushy” valve action.
Subtle adjustments to the valve guides can dramatically improve intonation and responsiveness. Listen critically for any pitch inconsistencies and correlate them with specific valve combinations. Remember‚ even minor tweaks can yield significant improvements. Patience and a discerning ear are crucial for achieving peak performance and a truly refined playing experience.
Resources for Further Learning
Online forums and dedicated repair manuals offer invaluable insights into trumpet maintenance. These resources provide detailed guidance and community support for valve work.
Accessing these materials empowers musicians to deepen their understanding and confidently address valve alignment challenges.
Online Forums and Communities
Engaging with online trumpet communities is an excellent way to learn from experienced players and repair technicians. Numerous forums host discussions specifically addressing valve alignment issues‚ offering practical advice and troubleshooting tips.
These platforms allow you to share your experiences‚ ask questions‚ and benefit from the collective knowledge of fellow trumpet enthusiasts. Searching for terms like “trumpet valve alignment” or “trumpet repair” will reveal relevant threads and dedicated groups.
Active participation can significantly accelerate your learning curve and provide valuable support when tackling DIY repairs. Remember to always verify information from multiple sources before implementing any adjustments to your instrument.
Repair Manuals and Guides
Comprehensive repair manuals provide detailed‚ step-by-step instructions for trumpet maintenance‚ including valve alignment procedures. These resources often feature diagrams and illustrations‚ clarifying complex processes and ensuring accurate execution.
Look for manuals specifically focused on trumpet repair‚ as they will cover valve mechanics and alignment techniques in greater depth. Online guides and downloadable PDFs can supplement physical manuals‚ offering additional perspectives and troubleshooting advice.
Investing in a quality repair manual is a worthwhile investment for any serious trumpet player or aspiring technician‚ providing a solid foundation for understanding and maintaining their instrument.