3D puzzles offer a unique challenge, transforming flat pieces into intricate three-dimensional structures. They enhance spatial reasoning and patience, appealing to puzzlers of all skill levels globally.

What is a 3D Puzzle?
A 3D puzzle is an interactive challenge where two-dimensional pieces are assembled to form a three-dimensional object. Unlike traditional puzzles, these require spatial reasoning and dexterity to create structures like landmarks, vehicles, or fantasy designs. The pieces, often made of foam, cardboard, or plastic, interlock without glue, offering a rewarding experience; 3D puzzles vary in complexity, from simple models for beginners to intricate designs for experienced puzzlers, making them accessible to all skill levels. They combine creativity, problem-solving, and patience, providing a sense of accomplishment as a flat set of pieces transforms into a vibrant, lifelike object.
Benefits of 3D Puzzles
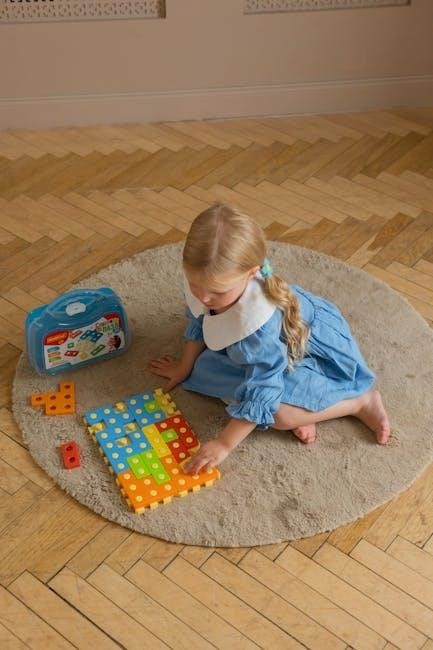
Engaging with 3D puzzles offers numerous cognitive and creative benefits. They enhance spatial reasoning, problem-solving skills, and hand-eye coordination while fostering patience and persistence. These puzzles are ideal for all age groups, promoting critical thinking and creativity. For children, they aid in developing fine motor skills and understanding geometric shapes. Adults can benefit from stress relief and improved focus. Completing a 3D puzzle provides a sense of accomplishment and pride in creating a tangible, three-dimensional object. Additionally, they encourage learning through trial and error, making them a rewarding and educational activity for individuals and groups alike.
Choosing the Right 3D Puzzle
Selecting the perfect 3D puzzle involves considering skill level, piece count, and theme. Beginners should opt for simpler designs with fewer pieces, while experienced puzzlers can tackle complex models featuring intricate details and unique shapes.
Factors to Consider Before Buying
When selecting a 3D puzzle, consider the age and skill level of the user, as well as the number of pieces and complexity. Choose puzzles made from durable, high-quality materials for longevity. Ensure the puzzle aligns with personal interests or themes to enhance enjoyment. Check for clear instructions or diagrams, especially for beginners. Assess the time commitment required, as larger puzzles can be more challenging and time-consuming. Additionally, consider the size of the completed piece to ensure it fits the intended display space. These factors help ensure a satisfying and enjoyable puzzling experience.
Popular Types of 3D Puzzles
3D puzzles come in various designs, catering to diverse interests and skill levels. Landmark models, such as the Eiffel Tower or Big Ben, are favorites among history enthusiasts. Mechanical puzzles, like gear-driven or movable models, appeal to those who enjoy engineering and physics. Crystal puzzles, with their transparent, interlocking pieces, offer a unique aesthetic challenge. Fantasy designs, inspired by movies or games, attract fans of fictional worlds. Thematic models, such as animals or vehicles, provide fun for hobbyists. Each type offers a distinct experience, making 3D puzzles versatile for all ages and preferences.
Preparing for Assembly
A dedicated workspace and organized tools are essential for a smooth assembly process. Ensure all pieces are within reach and instructions are reviewed beforehand to avoid delays.
Workspace Setup
Setting up a proper workspace is crucial for an efficient and enjoyable 3D puzzle assembly experience. Choose a sturdy, flat surface with ample space to accommodate all pieces and tools. Ensure good lighting to avoid eye strain and easily identify piece details. Cover the area with a soft cloth or mat to prevent damage to the pieces. Organize puzzle components in trays or small containers, sorting them by shape, color, or section as needed; Keep the instructions and any reference images within easy reach. For larger puzzles, consider using a turntable to access all sides comfortably. A well-prepared workspace minimizes frustration and enhances focus, allowing you to fully immerse yourself in the assembly process.
Understanding the Instructions
Understanding the instructions is essential for successfully assembling a 3D puzzle. Most puzzles come with a detailed booklet guiding you through the assembly process, often including both written and visual cues. Study the instructions carefully to identify key steps, such as how pieces connect and the order of assembly. Pay attention to color-coded markings or symbols that indicate specific orientations or sections. Some puzzles also provide reference images or diagrams to help visualize the final structure. If available, use online resources or video tutorials for additional guidance. Taking the time to understand the instructions ensures a smoother and more enjoyable assembly experience.

Building the Base
Building the base begins with corner pieces, aligning edges carefully. Use reference guides to ensure stability. A solid foundation is crucial for the entire structure’s integrity.
Starting with Corner Pieces
Identifying and placing corner pieces is essential for establishing the puzzle’s framework. These pieces typically have distinct edges or colors that set them apart. Begin by sorting and grouping corner pieces, then align them according to the reference image or instructions. Gently snap each piece into place, ensuring a secure fit. Once corners are set, build outward, connecting adjacent pieces to form the base layer. This method provides stability and guides the rest of the assembly. Work on a flat surface and handle pieces carefully to avoid damage. A strong base ensures the puzzle’s structural integrity as it progresses.
Constructing the Foundation
After placing the corner pieces, focus on building the foundation by connecting adjacent pieces around them. Use the reference image or instructions to align edges accurately. Ensure each piece fits snugly without forcing, as this can damage the material. Work section by section, gradually expanding outward. Pay attention to the puzzle’s symmetry and design cues, such as color or texture. A sturdy foundation is crucial for maintaining the structure’s stability as you progress. Handle pieces carefully to avoid bending or breaking. Once the base is complete, the rest of the puzzle will fit together more seamlessly. Patience and attention to detail are key during this phase.

Handling Complex Sections
Tackle challenging areas with patience and strategic planning. Use trial and error to test piece fits, ensuring alignment matches visual cues and piece shapes for accuracy.
Tips for Challenging Areas
When tackling complex sections, patience and strategic planning are key. Focus on one area at a time, ensuring each piece fits snugly without forcing. Use visual cues from the instructions or box top to guide placement. Trial and error can help identify correct orientations. If stuck, step back and approach later with fresh eyes. Rotate pieces to test fits, and consider working on adjacent sections to uncover connections. Handle pieces gently to avoid damage. Referencing online tutorials or community tips can also provide solutions for particularly tricky parts. Persistence and careful alignment will ultimately lead to success.
Using Trial and Error
trial and error is a valuable approach when assembling complex 3D puzzles. It allows you to test different piece orientations and placements without fear of failure. Start by examining the shape and design of each piece, then attempt to fit it into the puzzle. If a piece doesn’t align properly, rotate it or try it in a different section. Mistakes are part of the process, so handle them gracefully. Use the box top image or instructions as a reference to guide your attempts. This method is especially effective for intricate designs, as it helps reveal hidden connections and ensures a secure fit.
Final Assembly and Completion
Align all pieces precisely, ensuring a secure fit. Double-check the structure for stability and visual accuracy. Display your completed masterpiece proudly, celebrating your accomplishment and skill.
Aligning Pieces Correctly
Aligning pieces correctly is crucial for a stable and visually appealing final result. Start by matching colors, shapes, and visual cues on the pieces to their corresponding sections in the design. Gently rotate pieces to find the perfect fit, ensuring they lock securely without forcing. Use the puzzle’s edges or reference images as guides to maintain accuracy. Check each piece from multiple angles to confirm proper alignment. Avoid rushing, as patience ensures a precise fit. Once aligned, press pieces firmly but carefully to avoid damage. This step requires attention to detail to achieve a seamless and sturdy assembly.
Final Adjustments and Display
After completing the puzzle, inspect it for any misaligned pieces and make necessary adjustments. Gently wiggle sections to ensure stability and tighten loose connections. Use a soft cloth to remove dust or fingerprints for a polished look. For display, place the puzzle on a sturdy base or shelf, away from direct sunlight to prevent fading. Consider using a glass case for protection and to enhance visual appeal. Properly displayed, your 3D puzzle becomes a striking decorative piece, showcasing your dedication and skill. Ensure it is level and secure to maintain its structural integrity and longevity.